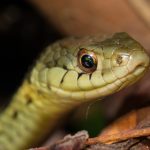
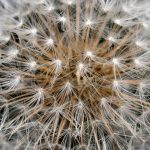
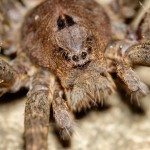
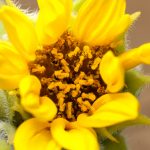
After posting some of my macro shots of the spider’s and insects, I’ve been asked about what kind of gear I use to create those images. Instead of buying an expensive macro lens, I’ve been able to piece together a rather inexpensive setup that lets me get close to 1 to 1 ratio. Below are some pictures and a list of the gear I use.
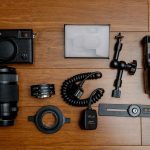

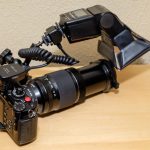
My primary camera is a Fuji X-Pro2 and when shooting macro, I generally try to use my Fuji 55-200mm zoom at its longest focal length. Between the camera and lens, I attach a pair of Macro Extension Tubes that let the lens and camera communicate and autofocus, but greatly reduces the close focus limit of the lens. This isn’t a free lunch though, as the lens loses the ability to focus towards infinity. On the front of the lens, I attach a Raynox-150 clip-on macro lens. Using the extension tubes and the Raynox-150, the 55-200mm close focus range is right around 5″ to 6″, as demonstrated below.
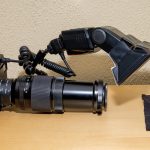
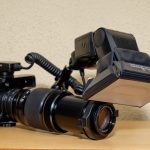
In the 2nd picture, you can see just how close you can get with this setup. The watch being photographed is a Citizen Eco-Drive with a 42mm case. Shooting an object that is flat such as this is much simpler than an insect, as the depth of field when shooting macro is insanely thin. For this reason, I normally use an aperture between f/14 and f/22, depending on the lens. Thankfully, diffraction at these tiny aperture’s isn’t too bad in the Fuji X system, at least for my uses. To help reduce the effect of camera shake, I generally use a shutter speed of at least 1/125 or 1/250, although with HSS support, faster speeds can now be used when shooting with a flash.
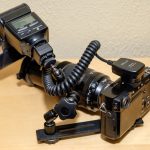
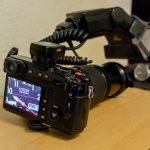
To get the subject lit up enough when using such small apertures and fast shutter speeds, a TTL flash is used. Pictured is a Fujifilm EF-42 that is connected to the camera with a Vello TTL Cord for Canon camera’s The pin layout is the same as Fuji, so it works just fine. Note that Canon flashes will not work in TTL mode on Fuji bodies, as the systems are completely different. On the end of the flash, I use a variety of small softboxes, depending on the subject. Holding the flash is a 7″ MagicArm that is connected to the camera via a Straight Flash Bracket. This lets me hold the camera with two hands to keep it steady and gets the flash into a position where it’s as close to the subject as possible.
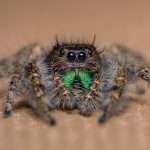
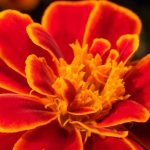
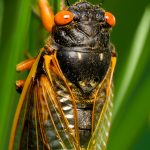
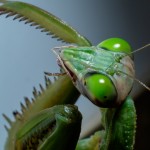
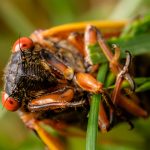
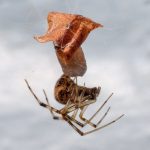
Below are some examples of my limited macro experience. All of the dedicated macro gear mentioned cost me about $125, while a dedicated macro lens can cost upwards of $1000. While the results I’m achieving may not quite equal an expensive macro lens, they are good enough for me.

Amazon Links to the macro specific items I use:
Vello CB-600 Straight Flash Bracket
MCOPlus MK-F-AF3 Macro Extension Tubes (10mm and 16mm)